Windows 10 basics: how to change your sign-in settings

When you buy a new Windows 10 computer, out of the box, it will default to having you enter your Outlook or Microsoft account password every time you sign in. This can be a hassle, especially if you have a long, secure, and complicated password.
Thankfully, Windows has several other ways you can sign in to your laptop that are a little simpler. We’ll walk you through how to adjust your settings and opt into signing in using a PIN, your fingerprint, or picture password. (Facial recognition is also available, but only on specific Windows 10 systems.) We’ll also show you how to remove your password altogether (although, to keep your device secure, we recommend that you go with one of the options above rather than eliminating any kind of sign-in).
Windows 10 also gives you the option to use a physical security key (usually a USB key) to sign in, but you’ll have to purchase that key separately. Here are the methods you can use to sign in without any additional equipment.
To access your sign-in settings:
- Click on the Windows icon in the bottom-left corner of your screen to open up the Start menu
- Click the cog icon to open settings
- Click “Accounts”
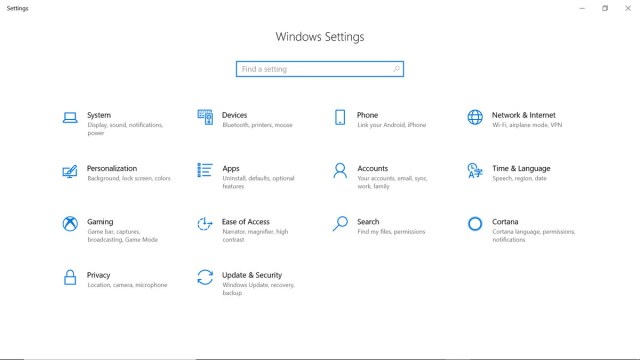
- Click “Sign-in options”

- Here, you can adjust how to sign in to your device. You can add a sign-on method by clicking on the option and then “Add.” And you can disable any of these options by clicking on the option and then “Remove.” You may be prompted to enter your Microsoft account password in order to remove an option.
- You can also adjust when your device asks you to sign in again after you’ve been idle. Under “Require sign-in,” you can select a range of options, from every time the system has gone dark to if it’s been dark for 15 minutes. You can also select “Never.”

To set up a PIN:
- Click “Windows Hello PIN”
- Click “Add”
- A window titled “Create a PIN” will open up. Click “Next.”
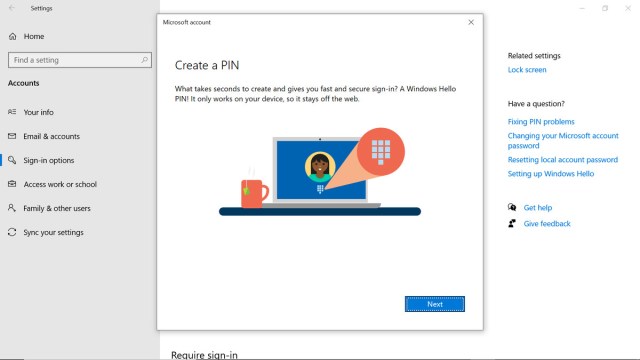
- You’ll then be asked to enter your Microsoft password. Enter it in, and click “Sign in.”
- Choose a PIN and enter it in both boxes. The default requirement for the PIN is that it only contains numbers. If you want to use letters and symbols as well, you can check the box in the bottom of the window.
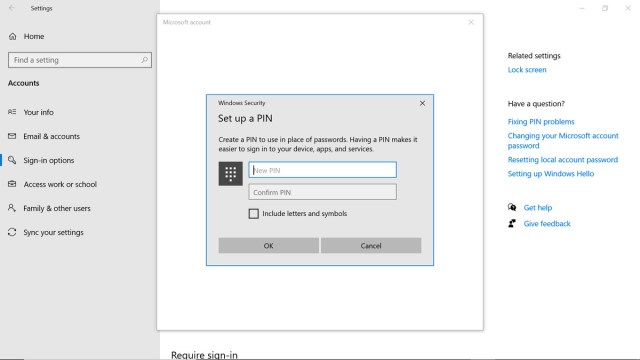
- You can change your PIN later by clicking on “Windows Hello PIN” then “Change.” Enter your old PIN and then your new PIN twice.

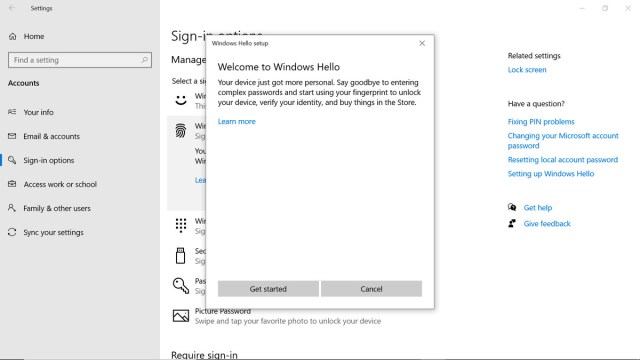
To use your fingerprint to sign in:
- Click “Windows Hello Fingerprint”
- Click “Set up”
- Windows Hello will open up. Click “Get started.”
- If you’ve already set up your PIN, you’ll be prompted to enter it in here
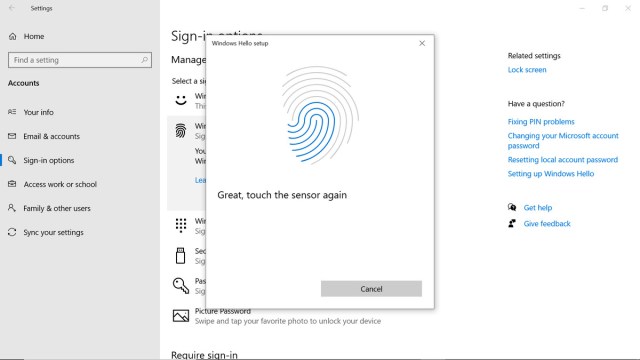
- Next, you’ll be asked to your raise your finger and place it on the fingerprint scanner repeatedly

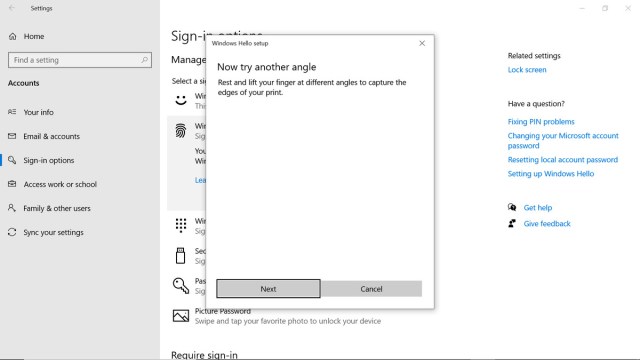
- Then, you’ll be asked to do the same, angling your finger differently each time
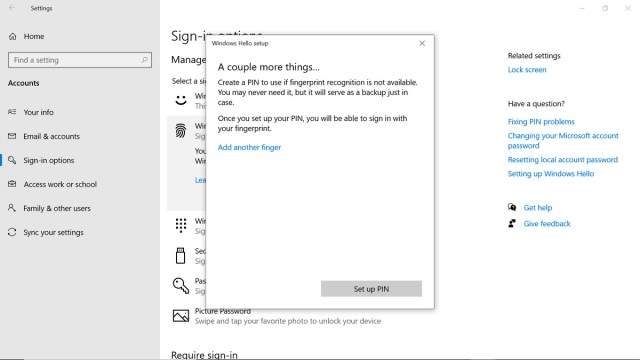
- If you haven’t done so already, you’ll then be asked to choose a PIN as a backup. Click “Set up PIN” to continue.
To set up a Picture Password:
Microsoft’s picture password option allows you to use a sequence of gestures paired with a picture to sign in. Instead of using a PIN or password, you’ll have to draw on a picture.
- Click on “Picture Password” in “Sign-in settings”
- Click “Add”
- You’ll be taken to the picture password setup page and asked to enter your Microsoft account password into a pop-up window
- Click “Choose picture”

- A window will open, and you’ll be able to browse through your photos. Select a picture, and then click “Open.”
- Click “Use this picture” to proceed or “Choose new picture” to select a different picture

- You’ll then be asked to draw three gestures — lines, circles, and taps — on the image. To sign in, you’ll have to repeat the gestures in the same order and in the same position on the image.

- Then you’ll have to confirm your picture password by doing those same three gestures again. If you can’t remember, click “Start over.”
- Click “Finish” on the next screen to complete setup.

To remove a password altogether:
Typing in your password can be a hassle, which is why there are alternative sign-in methods. If you want to go an extra step further, you can remove your password altogether. (Of course, disabling your password altogether is a security risk — using at least a simple PIN is a better move.)
- Click the Windows Start button
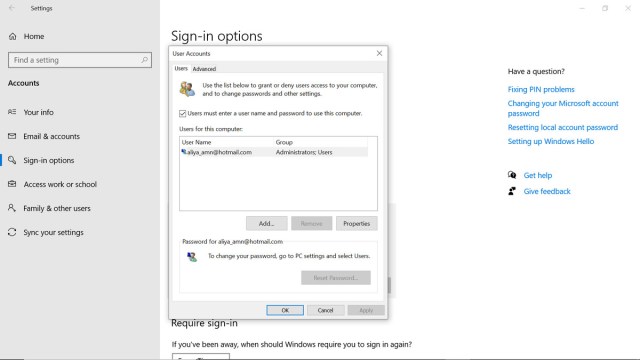
- Search for and open “netplwiz”

- A window will open. Uncheck the box next to “Users must enter a user name and password to use this computer.”
- Then click “Apply”
- Enter your password twice in the pop-up window and click “OK”

- Click “OK” again
The changes will go into effect after you restart your device.
To enable your password again:
- Open up “netplwiz”
- Check the box next to “Users must enter a user name and password to use this computer”
- Then click “Apply”
- Click “OK”
When you buy a new Windows 10 computer, out of the box, it will default to having you enter your Outlook or Microsoft account password every time you sign in. This can be a hassle, especially if you have a long, secure, and complicated password. Thankfully, Windows has several other…
