How to use Slack channels

Slack, the instant messaging app of choice for many companies, has probably become an even bigger part of your life if you’re working from home. And while Slack is usually used for work, it’s also very useful for conversing with friends and family. Slack offers paid plans, but anyone can sign up for the free version and create a workspace, a virtual space where you can set up different conversations and projects.
Each of those conversations and projects on Slack are called channels. These channels function like chat rooms or group chats. While there isn’t a limit to the number of channels you can make or private messages you can send in Slack, the free version will only let you see the last 10,000 messages sent in your workspace.
Slack is rolling out a newer version, so these instructions will vary depending on what version you’re on and whether you’re on a paid or free plan, but we’ve included all of the steps below.
Create a channel
- Depending on your version of Slack, you’ll either see a regular + next to “Channels” near the top of the left-hand column, or you’ll see a circle with a + sign in it. Click on that button. If you have the regular + sign, you’ll have to select “Create a channel” from the drop-down button. Otherwise, you’ll get the “Create a channel” pop-up box immediately.
- Type in a name for your channel and add a description if you like. You also have the option to make the channel private, which means others can only see or join it if you invite them. Users designated as owners or admins can make any channel they’re part of (other than the #general channel) private at any time, but once you make it private, you can’t make it public again.

- Click “Create.”
- A window will pop up allowing you to add members to your channel. You can add everyone in your workspace, a few select people, or you can skip adding people for now. You can also set up the channel so that anyone who joins your workspace is automatically added to the channel. Make your selections and click the “Done” button in the lower right corner of the window. You can also click the “X” in the top right corner of the window to skip this step.

Join a channel
You can join public channels in a couple of different ways:
- You can browse through a list of public channels on your workspace to find one to join. If you have that circular + button next to “Channels,” then clicking on “Channels” will take you straight to the channel browser. If you have the plain +, click on that and then select “Browse channels” from the drop-down menu next to the button. You can also open the channel browser by clicking Ctrl + Shift + L on a Windows computer or Command + Shift + L on a Mac. The channel browser will show you all of the public channels in your workspace.
- Filter the channels by typing in what you’re looking for in the search bar at the top. Click on a channel name to open the channel (you may also have to click the “Preview” button in the sidebar on the right-hand side), then click “Join Channel” at the bottom of the page to join it.
- If you already know the name of the channel you want to join, you can type that channel’s name in the search bar located either at the top of the screen or in the upper left-hand corner under your name. As you type, a list of channels will come up. Click on the channel you want to join and then click on the “Join Channel” button at the bottom of the page to join it.

- You can also type “/join [channel name]” (without the quotation marks) in the message box at the bottom of the screen to join a channel without previewing it first.
Add someone to an existing channel
While anyone can join a public channel in a workspace, they’ll have to be added by a current member in order to join a private channel. If you’re a member of a public or private channel, here’s how to add a new member:
- Open the channel and select (depending on your version of Slack) the cog settings icon or the “Details” button in the top right corner.
- Click “Add people to channel” or the “Add” button (again, depending on your version).
- If you’re adding them to a private channel, you can choose to either “Add to [channel name],” which gives the new members access to the channel’s history, or “Create a new channel,” which creates a new private channel with the members from that channel in it. Make your selection, then click “Continue.” You’ll then be taken to the “Add people” window.

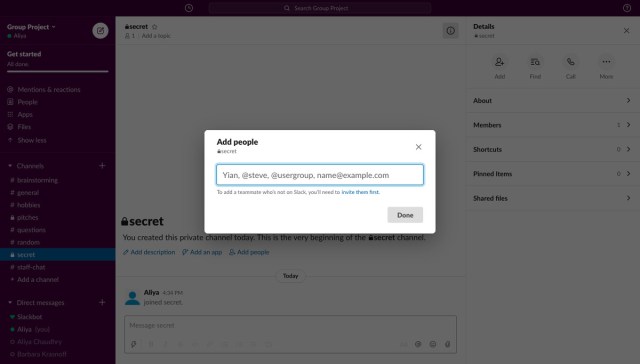
- If you’re adding people to a public channel, you’ll be taken straight to the “Add people” pop-up window without seeing that previous window. In the “Add people” window, type the name of whomever you want to add into the bar. As you type, names of people in the workspace will appear below the bar. Click on the names you’d like to add and then click “Add” or “Done.”
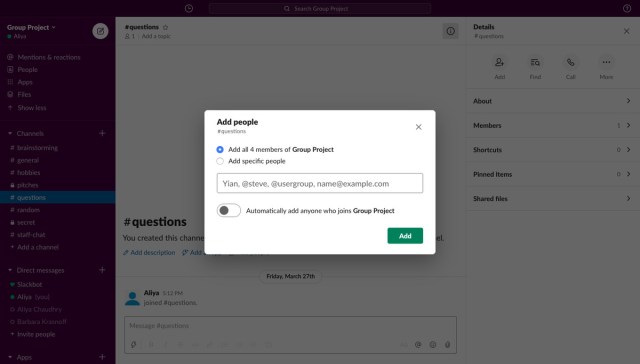
- If you created a public channel and you’re adding people to it, the “Add people” pop-up window will look a little different. It will ask you whether you want to add everyone in your workspace to that channel or if you just want to add specific people. To add people individually, begin typing their names in the bar. As you type, names will appear in a drop-down menu; click on those you want to add. You can also choose to add everyone who joins the workspace to the channel. When you’re done, click “Add” or “Done.”

Set a channel topic
At the top of your screen, underneath the channel name, is the channel topic, which acts like a description for that channel. Channel topics can be useful for keeping people updated on the conversation or letting others know what the channel’s for. You can set or change the channel topic at any time.
To set the topic:
- Open a channel.
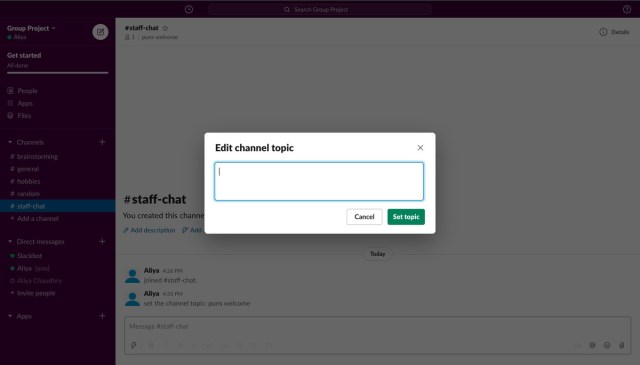
- Click “Add a topic” below the channel name.
- Type the topic into the box in the window that appears.
- Click “Set topic.”
To change the channel topic:
- Hover over the channel topic.
- Click on the blue “Edit” that appears.
- Write a new channel topic.
- Click “Set topic.”
Mute notifications
Being a part of several channels on Slack can be overwhelming at times — especially when you’re constantly getting notifications about unread messages from every channel you’re in. You can mute channels that you’re less interested in, which means the channel name on the left-hand side won’t become bold every time someone sends a message. Here’s how to do that:
- Open up the channel
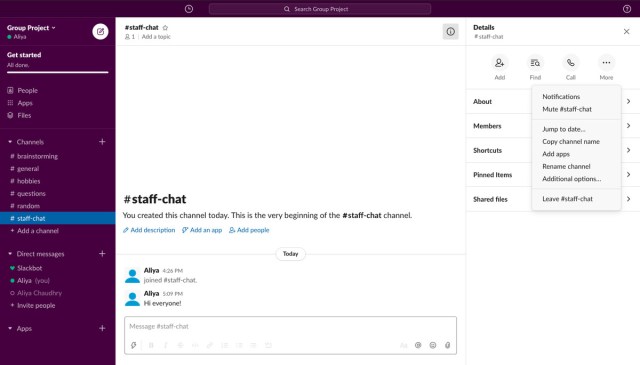
- Click on the cog icon next to the channel name, toward the upper right-hand corner of the screen. If you can’t see a cog icon, click on “Details” in the top right corner and then “More.”
- Click “Mute [channel name].”
Vox Media has affiliate partnerships. These do not influence editorial content, though Vox Media may earn commissions for products purchased via affiliate links. For more information, see our ethics policy.
Slack, the instant messaging app of choice for many companies, has probably become an even bigger part of your life if you’re working from home. And while Slack is usually used for work, it’s also very useful for conversing with friends and family. Slack offers paid plans, but anyone can…
