How to edit, delete, and restore a Facebook post
None of us are perfect, and all of us have published Facebook posts with misspellings, grammatical errors, mistaken “facts,” or opinions that we immediately realized might not need to be aired in public. When that happens, you’re going to want to hop into your post and fix the problem — either by changing it or deleting it altogether. Luckily, it’s really easy — if you know how.
What follows are directions on how to edit a Facebook post, delete it, and restore it on the web and using the mobile app. (I used the Facebook app on a Pixel 6, but the steps will be similar on other phones and on iOS.)
On the web
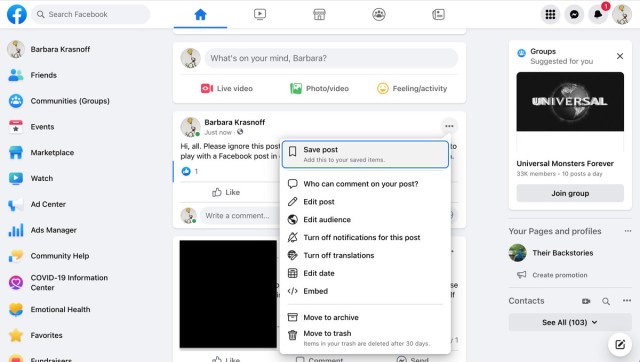
- In the post you want to edit, click on the three dots in the upper right of your post.
- Click on Edit post if you want to change it; make your edits, and then click on Save.
- Click on Move to trash if you want to delete it, and then click on Move.

Note: when you “delete” a post, you will actually be moving it to a trash section, where it will be finally deleted after 30 days. If you want to restore it or delete it immediately, follow the following steps.
- Click on your personal icon in the upper right corner
- Click on Settings & privacy > Activity log
- In the left-hand column, scroll down to and select Trash
- Find the post and click its checkbox. Click on Restore to restore it to your timeline, or Delete to permanently delete it.
- In the resulting pop-up, click on Restore or Delete.

On a mobile device
- Tap on the three dots in the upper-right corner of the post
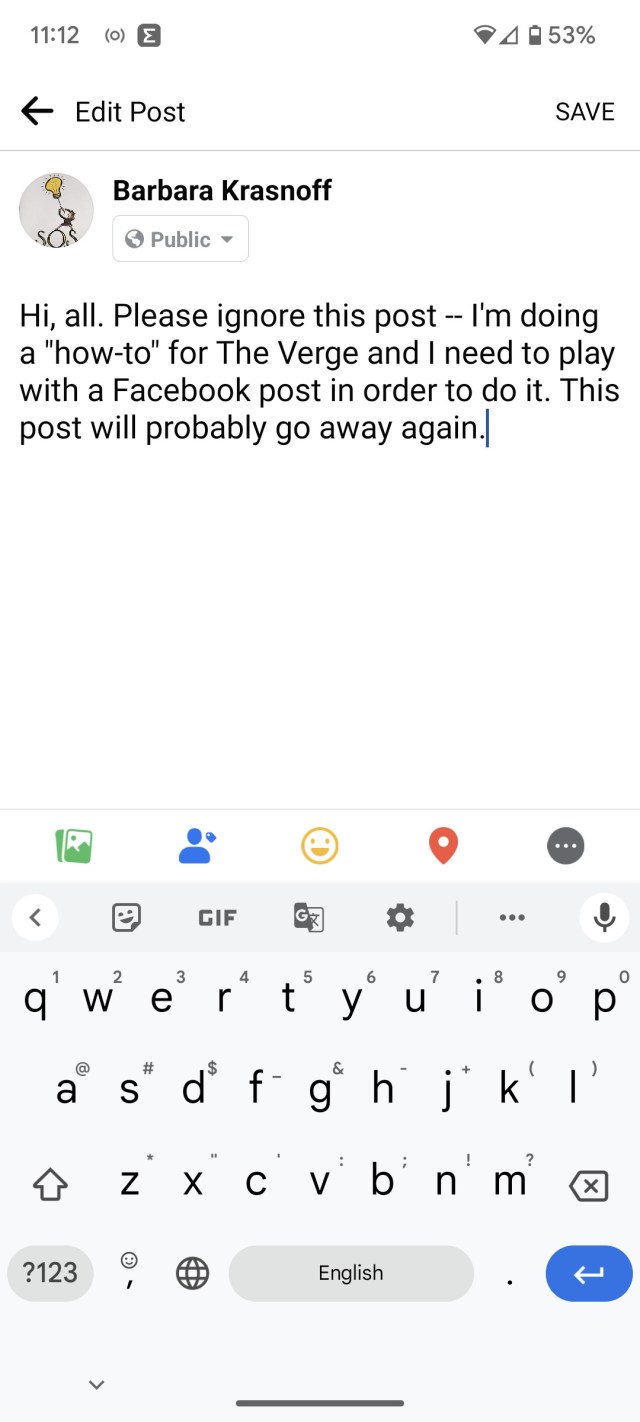
- Select Edit post if you want to change it; make your edits, and then click on Save.
- Select Move to trash if you want to delete it, and then click on Move.


The process of restoring or permanently deleting a post is similar to that on the web.
- In your timeline, tap on your personal icon in the upper left corner.
- Tap on the three dots to the right of Edit profile.
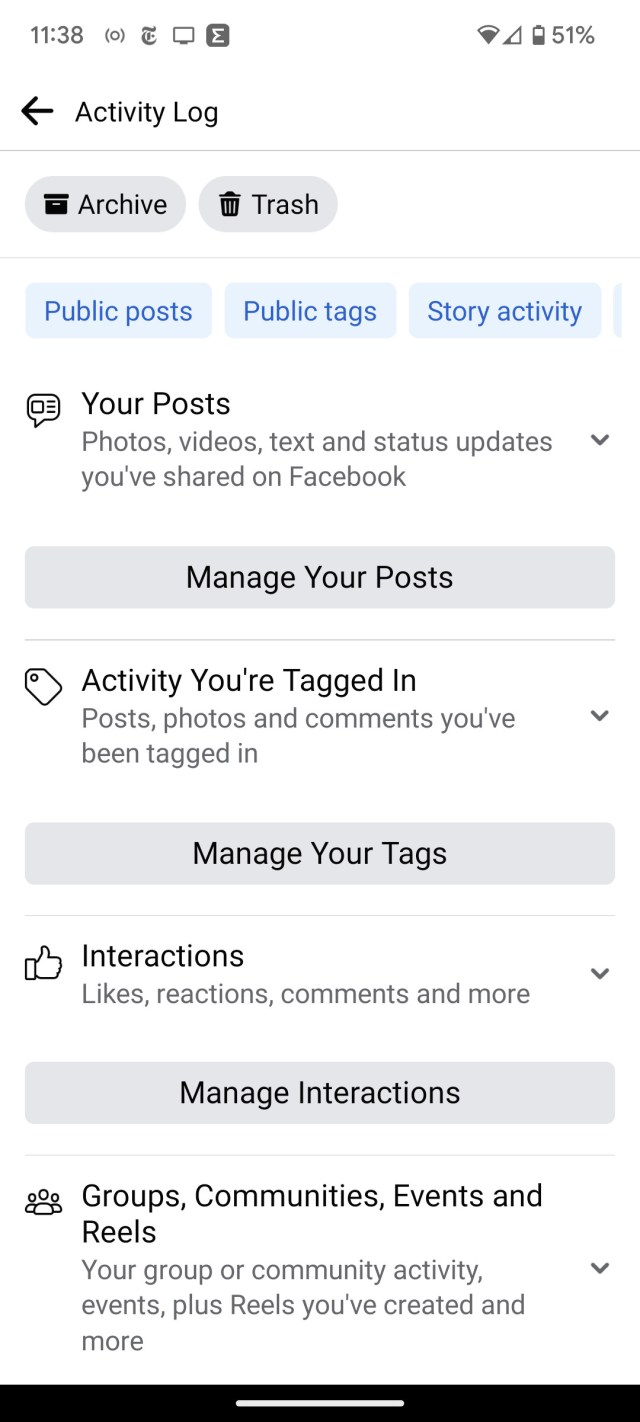
- In your Profile settings, select Activity log > Trash.
- Select the checkbox of the post you want to restore or delete.


- To restore the post, tap on Restore at the bottom of the screen. To permanently delete it, tap the three dots at the bottom right, and select Delete.
- Tap Restore or Delete in the pop-up menu.
None of us are perfect, and all of us have published Facebook posts with misspellings, grammatical errors, mistaken “facts,” or opinions that we immediately realized might not need to be aired in public. When that happens, you’re going to want to hop into your post and fix the problem —…
Recent Posts
- UK private health services firm told to pay up $2m for ransomware hit
- Twelve South’s Find My-compatible charger is on sale starting at just $49
- 8 Best Projectors According to Our Reviewers (2025)
- US soldier pleads guilty to AT&T and Verizon cyberattacks, linked to Snowflake data theft
- The best gaming keyboards of 2025
Archives
- February 2025
- January 2025
- December 2024
- November 2024
- October 2024
- September 2024
- August 2024
- July 2024
- June 2024
- May 2024
- April 2024
- March 2024
- February 2024
- January 2024
- December 2023
- November 2023
- October 2023
- September 2023
- August 2023
- July 2023
- June 2023
- May 2023
- April 2023
- March 2023
- February 2023
- January 2023
- December 2022
- November 2022
- October 2022
- September 2022
- August 2022
- July 2022
- June 2022
- May 2022
- April 2022
- March 2022
- February 2022
- January 2022
- December 2021
- November 2021
- October 2021
- September 2021
- August 2021
- July 2021
- June 2021
- May 2021
- April 2021
- March 2021
- February 2021
- January 2021
- December 2020
- November 2020
- October 2020
- September 2020
- August 2020
- July 2020
- June 2020
- May 2020
- April 2020
- March 2020
- February 2020
- January 2020
- December 2019
- November 2019
- September 2018
- October 2017
- December 2011
- August 2010