How to change your inbox layout in Gmail

Gmail offers you several customizable formats — so many that you can have multiple Gmail accounts and they can all look completely different. For example, you can have all of your emails in one long list, you can separate your messages into multiple tabs, or you can have your inbox split into unread and read messages.
In addition to that, there are several other ways to organize your inbox, from adding a reading pane to coming up with your own categories for organizing emails. Here’s how you can customize your Gmail interface and explore all of the options.
How to change your inbox layout:
- Click on the cog icon in the top-right corner of the screen
- A “Quick settings” sidebar will open on the right side of your inbox, which will allow you to adjust some settings. For example, you can adjust display density, which controls how compact your messages appear. You can also choose the position for your reading pane and what inbox type you have. (We’ll go into those later.)
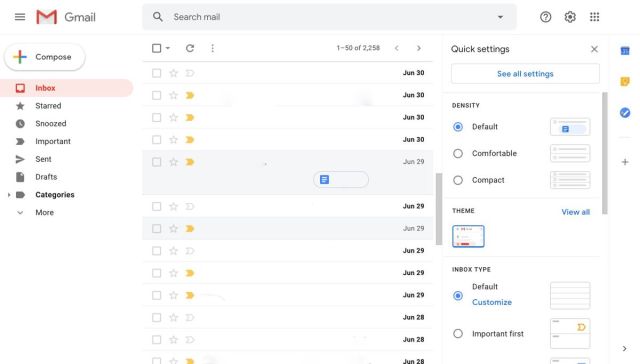
- Click “See all settings” at the top of this sidebar for more options
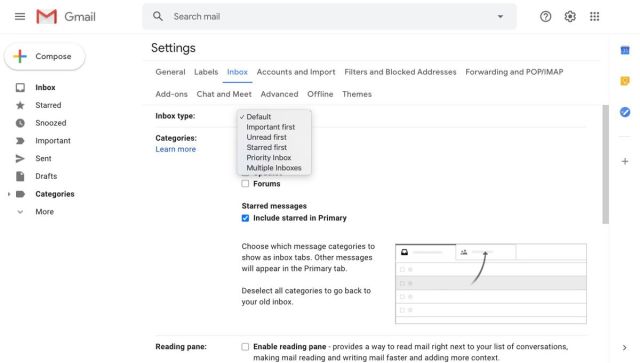
- Click the Inbox tab
Next to “Inbox type,” you have a number of options to choose from in the drop-down menu:
- “Default” puts your emails into the familiar separate vertical tabs
- “Important first,” “Unread first,” and “Starred first” each split the inbox into two sections horizontally: the section you choose as first (Important, Unread, or Starred) and then everything else
- “Primary inbox” and “Multiple inboxes” each create different sections within your email, and you can scroll down to view each section. (We’ll go into how to customize both setups later in this article.) Depending on which type of Inbox you choose, the next few steps will be a little different.
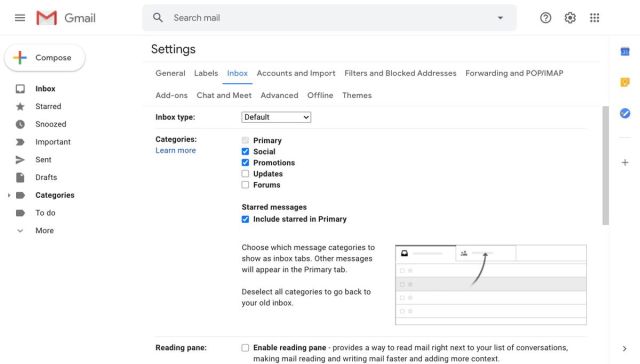
- If you select the Default inbox setup, underneath “Inbox type,” next to “Categories,” you can check the boxes to decide how your emails are sorted. You can hover over each category name to see examples of what kinds of emails will be sorted into which tab. If you want your email to show up all in one tab, you can uncheck all of the boxes. (But you can’t deselect Primary.) You also have the option to “Include starred in Primary” so that any email you star will also show up in Primary, no matter what other category it falls into.
- The options for “Important first,” “Unread first,” and “Starred first” are similar. Under “Inbox sections,” you can click on the Options button to select how many emails you want to appear in each section.

- If you select “Important first” or “Priority Inbox,” you’ll see an additional option that lets you change how Gmail counts your unread emails: whether that number reflects just the important unread emails, all of your unread emails, or a ratio of the important ones compared to all of them.
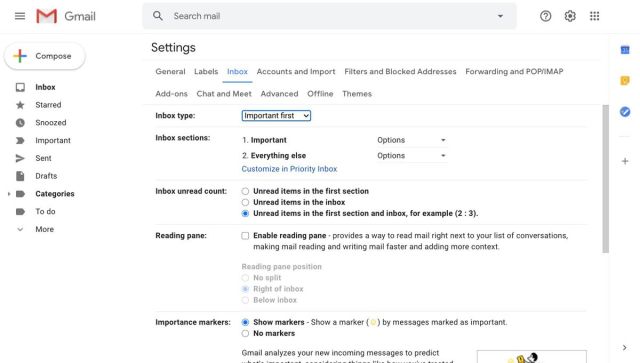
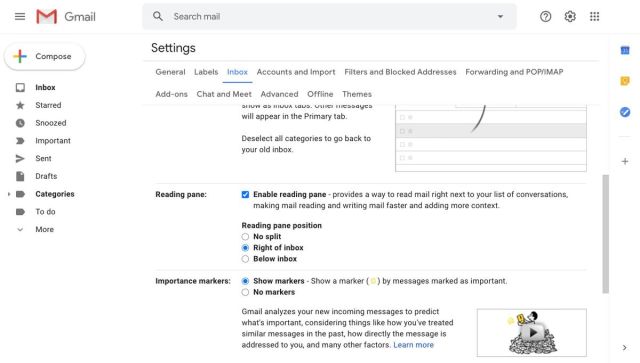
- You also have the option to add a reading pane, unless you’re in the Multiple Inboxes layout. After checking the box next to “Enable reading pane,” you can use the options below it to select the placement for the pane.
- In the “Importance marker” section, you can choose whether Gmail displays yellow tabs (indicating an important message) next to emails and whether Gmail assigns them automatically based on your activity
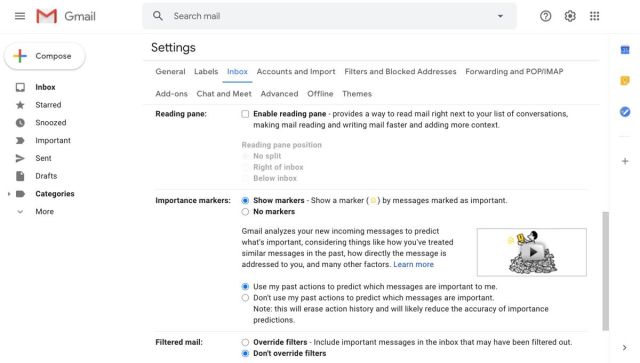
- At the bottom of the page, there’s an option to “Override filters” or “Don’t override filters.” You can adjust those filters in the “Filters & Blocked Addresses” tab in Settings.
- When you’re done, don’t forget to click “Save Changes”

How to configure Priority Inbox:
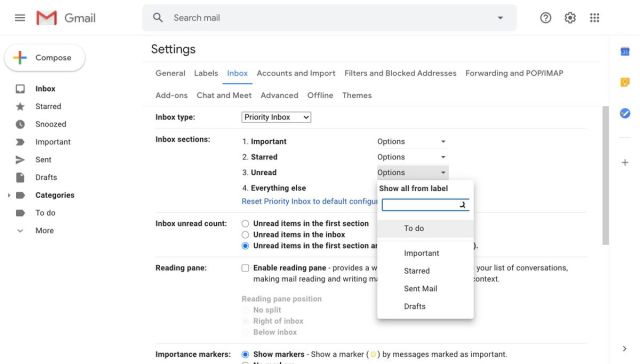
If you choose to go with Priority Inbox, you can use the drop-down next to each option in “Inbox sections” to choose which categories to include and which to remove, how many messages from each section to include, and whether to hide a section when it’s empty.

- To add another section, go to the Label tab at the top of the Settings menu
- Click the “Create new label” button at the bottom of the menu
- Type in a name for your label in the pop-up window. Then click “Create.”

- Go to the “Inbox” tab and click “Options” next to an inbox section
- Select “More options” from the drop-down menu
- Select the label from the drop-down options that appear
- Click “Save changes” at the bottom of the menu
How to set up multiple inboxes:
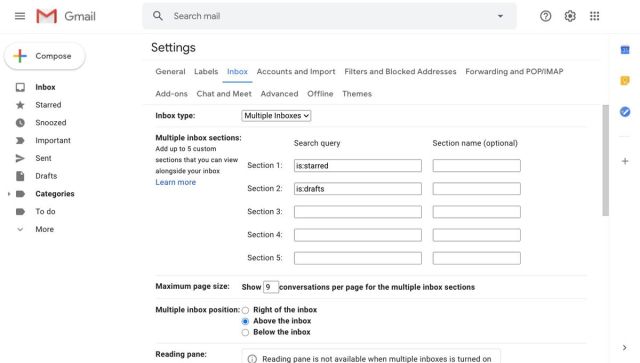
- Select Multiple inboxes in Inbox type.
- To set up your inboxes, you’ll have to enter in each category as a search operator, such as is:starred or is:unread. You can create up to five sections.
- You can add a label for each category in Section Name
- Type in the number of emails you want displayed in each category, next to “Maximum page size”
- To change the placement of the sections, adjust it in “Multiple Inbox position”
Gmail offers you several customizable formats — so many that you can have multiple Gmail accounts and they can all look completely different. For example, you can have all of your emails in one long list, you can separate your messages into multiple tabs, or you can have your inbox…
